Learning how to inspect golf shafts is an important part of long-term golf club maintenance. Shafts handle repeated loading during every swing, while travel, storage, moisture, and accidental impacts can create additional stress. Most quality shafts can last for many years under normal use. However, damage may develop after a club hits a hard object, gets crushed inside a vehicle, experiences corrosion, or receives rough treatment during travel. Some problems are easy to see, while others appear as small cracks, dents, splinters, or unusual changes in the shaft’s surface. A quick inspection can help you notice these warning signs before your next round. More importantly, knowing when to stop using a questionable club can reduce the chance of further equipment damage.
Why Golf Shaft Inspections Matter
Golfers often spend more time checking clubfaces and grips than shafts.
That makes sense because those areas show obvious wear. However, the shaft connects your hands to the clubhead and experiences significant forces during every swing.
A damaged shaft may feel different, perform unpredictably, or eventually fail.
Fortunately, you do not need specialized equipment for a basic visual check.
You can inspect golf shafts at home using good lighting, a clean cloth, and a careful approach.
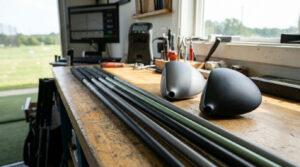
If something looks questionable, a qualified club repair professional can perform a more detailed assessment.
Understand Your Shaft Material First
Before inspecting anything, identify whether your club uses a steel or graphite shaft.
Steel shafts usually have a metallic appearance unless they have a special finish or coating. They are strong, but moisture and damage to the finish can contribute to corrosion.
Graphite shafts contain composite materials and may show different forms of damage. Scratches can be cosmetic, but deeper cuts, cracks, fibers, or splintering deserve attention.
Some shafts also use decorative finishes that make surface damage harder to interpret.
Knowing the material helps you understand which warning signs matter most.
Clean the Shaft Before Inspecting It
Dirt can hide small imperfections.
Before you inspect golf shafts, wipe each one with a clean, slightly damp microfiber cloth. Remove dust, dried mud, grass, and other residue.
Afterward, dry the shaft thoroughly.
Avoid aggressive cleaners unless the shaft or club manufacturer recommends them.
Strong chemicals or abrasive materials may damage certain finishes.
Once clean, place the club under bright, even lighting. Natural daylight can work well, although a strong indoor light also makes surface changes easier to see.
Start at the Grip
Begin your inspection at the top of the club.
Look where the grip ends and the exposed shaft begins.
Check for unusual bending, dents, scratches, or changes in the finish.
Although serious shaft damage near the grip is less common during ordinary play, clubs can become stressed when they are transported or stored incorrectly.
Rotate the club slowly as you inspect it.
Looking from only one angle can cause you to miss a narrow crack or dent on the opposite side.
Work Slowly Down the Entire Shaft
Move your eyes gradually from the grip toward the clubhead.
Do not simply glance at the shaft from several feet away.
Instead, rotate it while looking at each section.
Pay attention to areas where the finish suddenly changes.
Small cosmetic marks are common, especially on older equipment. However, a deep scratch, visible crack, dent, bulge, or exposed material deserves closer examination.
When you inspect golf shafts, consistency matters. Checking the entire length gives you a better chance of identifying unusual areas.
How to Check Steel Golf Shafts
Steel shafts can develop scratches, dents, bends, and corrosion.
Start by looking for orange or brown discoloration that could indicate rust.
Surface marks do not always mean the shaft is structurally compromised. Still, corrosion should not be ignored, especially if it appears severe or concentrated in one area.
Next, look for dents.
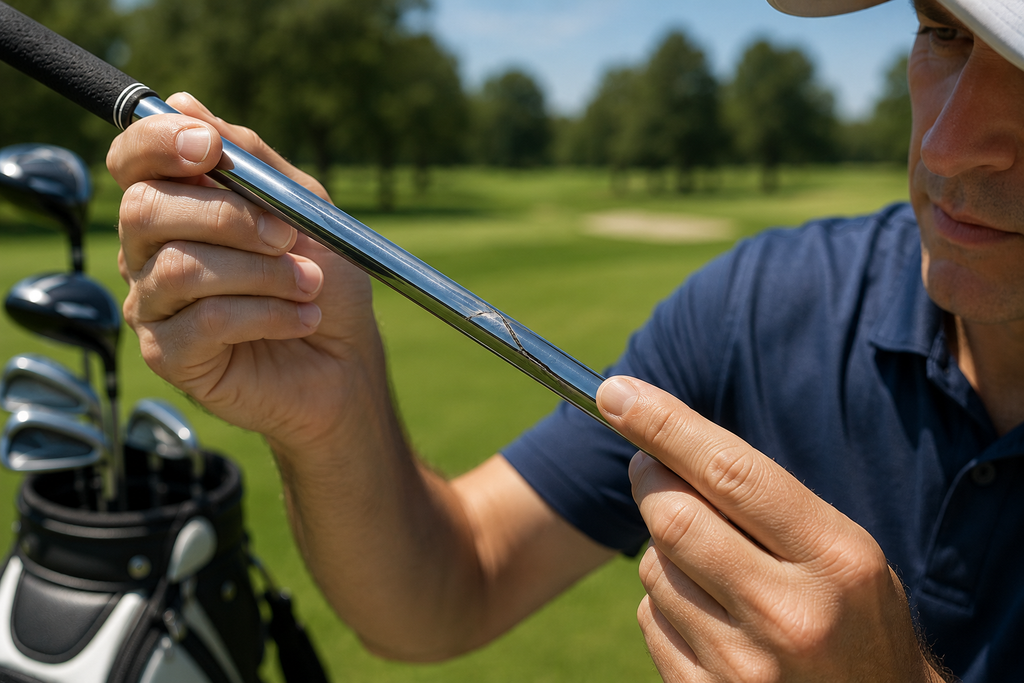
Even a relatively small dent changes the shape of the shaft and deserves professional evaluation.
Finally, sight down the shaft to check whether it appears unusually bent.
Do not attempt to straighten a damaged shaft yourself.
Watch for Rust on Steel Shafts
Moisture is a common enemy of steel golf equipment.
Clubs stored while wet can develop corrosion, especially when water remains trapped inside a damp golf bag.
When you inspect golf shafts, pay attention to areas near labels, steps, and the lower portion of the shaft.
Light surface discoloration may differ from deeper corrosion.
If rust appears severe, pitted, or widespread, ask a club technician to evaluate the shaft.
Prevention is easier than repair. Dry your clubs after wet rounds and store them in a ventilated, low-moisture environment.
Do Not Ignore Dents
A dent is more concerning than an ordinary surface scratch.
Steel shafts rely on their shape and structure to perform correctly.
If you find a visible dent, stop treating the issue as purely cosmetic.
The safest approach is to have the club examined by a qualified repair professional before continuing normal use.
This is particularly important when the dent appeared after a significant impact.
Replacing a damaged shaft can be inconvenient, but continuing to swing questionable equipment may create a larger problem.
How to Check Graphite Golf Shafts
Graphite requires a different inspection approach.
The outer finish can collect cosmetic scratches over time. However, deeper damage may affect the composite structure beneath the surface.
Look carefully for cracks, splits, raised areas, exposed fibers, or splintering.
Run your eyes along the shaft while rotating it slowly.
Avoid aggressively rubbing a suspicious area with bare fingers because damaged graphite may contain sharp fibers.
When you inspect golf shafts made from graphite, treat visible fiber damage seriously and seek professional advice.
Pay Attention to the Bag-Rub Area
Golf shafts can repeatedly contact the top of a golf bag while walking, riding, or transporting equipment.
Over time, this contact may create visible wear.
Graphite shafts deserve particular attention because repeated abrasion can damage their protective finish.
Inspect the area where each shaft normally rests against the bag divider.
Look for deep grooves, worn coatings, or exposed fibers.
A small cosmetic mark may not affect performance, but significant material loss should be evaluated.
Using a bag with smooth, well-maintained dividers can reduce unnecessary abrasion.
Check Around the Ferrule
The ferrule is the small component commonly located where the shaft enters the clubhead on many irons and woods.
Sometimes a ferrule can move slightly without the shaft itself being damaged.
However, a visible gap may still deserve inspection.
Check whether the clubhead feels secure.
Look for cracks near the shaft tip and signs that components have shifted.
Do not assume every ferrule gap means the club is about to fail. Instead, have questionable movement checked by a club technician.
This area experiences significant stress, so careful inspection is worthwhile.
Inspect the Shaft Near the Clubhead
The lower section of the shaft deserves special attention.
This area experiences substantial loading during the swing and may also encounter accidental impacts.
When you inspect golf shafts, rotate the club slowly while looking just above the hosel or adapter.
With graphite, check for cracks, chipped material, or visible fibers.
With steel, look for bends, corrosion, or dents.
If damage appears close to the clubhead, avoid testing the club with full swings until a professional evaluates it.
Check Adjustable Driver and Wood Shafts
Modern drivers and fairway woods often use removable shaft adapters.
Inspect the area where the shaft meets the adapter.
Look for cracks, unusual gaps, loose components, or damage around the connection.
Also check whether the adapter and clubhead connect securely according to the manufacturer’s instructions.
If the head repeatedly becomes loose, do not simply keep tightening it without investigating the cause.
The problem may involve the screw, adapter, or another component.
A golf repair shop can determine what needs attention.
Look for Paint Cracks Carefully
Paint or clear-coat damage does not always mean the shaft underneath has cracked.
This can make graphite inspection confusing.
A small surface chip may be cosmetic, while a deeper line may indicate more significant damage.
Avoid trying to prove the difference by aggressively bending or twisting the shaft.
Instead, photograph the area and compare it under strong lighting.
If you remain uncertain, have a technician inspect it.
When you inspect golf shafts, caution is better than testing a questionable area with a full-speed swing.
Listen for New or Unusual Sounds
Visual inspection is important, but golfers should also notice changes during normal handling.
A new clicking, creaking, or rattling sound may come from several parts of a club.
It does not automatically prove that the shaft is cracked.
Loose components, debris, adapters, or clubhead issues can also create noise.
Still, an unexplained sound deserves investigation.
If a club suddenly sounds different after an impact or travel, stop using it until you can identify the source.
Notice Sudden Changes in Feel
A damaged club may occasionally feel different before you identify a visible problem.
Perhaps the shaft suddenly feels unstable, unusual, or inconsistent.
However, changes in ball flight or feel can also come from your swing.
Therefore, do not diagnose shaft damage from one poor shot.
Instead, inspect the club carefully.
Compare it with similar clubs and consider whether a recent impact could have caused damage.
If the change persists and you cannot explain it, professional inspection is sensible.
Sight Down the Shaft for Bending
You can perform a basic straightness check by holding the club safely and looking along the length of the shaft.
Rotate it slowly.
A significant bend may become visible from certain angles.
However, shaft shapes and designs vary, so this method has limitations.
Do not attempt to bend a suspicious shaft back into position.
If you believe the club has changed shape, bring it to a repair professional.
A technician can determine whether replacement is necessary.
Inspect Clubs After Travel
Air travel and long road trips can expose golf clubs to unusual forces.
Even a strong travel case cannot eliminate every risk.
Therefore, inspect golf shafts after significant travel, especially if the bag appears to have received a hard impact.
Check the driver and woods first because their longer shafts can be more vulnerable to certain types of stress.
Then examine irons and wedges.
Look at clubheads, ferrules, adapters, and grips as well.
A five-minute inspection before your next round can reveal damage you might otherwise discover on the first tee.
Check Your Clubs After a Hard Impact
Golf clubs occasionally hit tree roots, rocks, cart paths, range barriers, or other hard objects.
If that happens, inspect the affected club immediately.
Do not make another full-speed swing simply to see whether it still works.
Look at the shaft, hosel, clubhead, and grip.
Pay particular attention to the lower shaft.
If you see a crack, dent, bend, splinter, or other unusual change, stop using the club.
Professional evaluation is the safer next step.
Never Intentionally Stress-Test a Damaged Shaft
If you suspect damage, avoid bending the shaft by hand to see whether the crack grows.
Do not strike the club against the ground or make increasingly hard swings.
These tests can worsen an existing problem.
Instead, document what you see.
Take clear photographs if necessary and bring the club to a qualified technician.
A cautious inspection protects both the equipment and the people around you.
How Often Should You Inspect Your Shafts?
There is no universal inspection schedule for every golfer.
Frequency depends on how often you play, how you transport your clubs, and the conditions in which you store them.
A casual golfer might perform a detailed check during regular club cleaning.
Frequent players can make visual inspection part of their normal maintenance routine.
You should also inspect golf shafts after unusual impacts, travel, or extended storage.
Quick checks take little time and can become a useful habit.
Inspect Used Clubs Before Buying
Shaft condition matters when purchasing secondhand golf clubs.
Start by checking whether the shaft model and flex match the seller’s description.
Then examine the entire surface.
Look for rust on steel and significant scratches or fiber damage on graphite.
Check the area near the clubhead carefully.
Also look for signs that the shaft may have been altered or repaired.
If you are buying expensive used equipment and have doubts, professional inspection can provide additional confidence.
Check Shafts Before Selling Clubs
A seller should inspect equipment carefully before listing it.
Clean the shaft and identify cosmetic marks honestly.
If you notice damage that may affect safety or performance, disclose it clearly rather than presenting the club as normal.
Accurate descriptions help buyers make informed decisions.
They also reduce disputes after a sale.
Good equipment maintenance is valuable whether you plan to keep a club or eventually sell it.
Protect Shafts Inside Your Golf Bag
Prevention begins with how you carry your equipment.
Keep bag dividers clean and inspect them for rough or damaged edges.
Avoid forcing too many clubs into a crowded section.
Graphite shafts should not repeatedly grind against abrasive surfaces.
Also avoid placing heavy objects on top of a golf bag.
During transportation, secure the bag so it cannot slide violently around a vehicle.
Small habits can reduce unnecessary wear over many rounds.
Store Golf Clubs in a Dry Environment
Moisture can create problems, especially for steel components.
After playing in rain, remove clubs from the bag if necessary and allow everything to dry thoroughly.
Do not leave wet towels wrapped around shafts.
Likewise, avoid long-term storage in extremely damp locations.
A clean, dry, reasonably temperature-stable area is generally preferable.
Good storage helps protect grips, shafts, clubheads, and the bag at the same time.
Be Careful When Removing Clubs From the Trunk
Vehicle trunks can become hot, crowded, and rough on golf equipment.
Heavy objects may shift onto a golf bag.
Clubs can also become trapped beneath luggage.
When loading your vehicle, give the golf bag enough space.
Avoid stacking heavy equipment directly across exposed club shafts.
If something falls onto the bag during transportation, inspect golf shafts before your next round.
Damage is easier to address before you start swinging.
What Normal Wear Looks Like
Not every mark requires a new shaft.
Minor cosmetic scratches, label wear, and finish changes can occur through ordinary use.
Steel may lose some visual shine, while graphite finishes can develop superficial marks.
The important question is whether the underlying structure appears affected.
Deep dents, significant corrosion, cracks, splintering, exposed fibers, or abnormal bending deserve more concern than light cosmetic wear.
If you cannot confidently tell the difference, professional inspection is the best option.
When Should You Stop Using the Club?
Stop using a club when you find damage that could indicate structural failure.
Examples include visible graphite splintering, a significant crack, a dented steel shaft, severe corrosion, or an obvious bend.
You should also stop if the clubhead or adapter appears loose.
Do not attempt another full swing to confirm the problem.
A repair technician can determine whether the shaft can remain in service or needs replacement.
The cost of an inspection is minor compared with the potential consequences of a club failing unexpectedly.
Can a Damaged Golf Shaft Be Repaired?
The answer depends on the type and location of damage.
Some club issues involve replaceable components rather than the shaft itself.
However, structural shaft damage often leads to replacement instead of a simple repair.
Graphite cracks and significant steel dents should receive professional evaluation.
Do not use tape, glue, or another improvised material as a structural repair.
Golf shafts experience substantial forces, so any solution must be appropriate for the club.
When Shaft Replacement Makes Sense
Replacement becomes practical when the existing shaft is structurally damaged or no longer suitable.
A club technician can remove the old shaft and install a compatible replacement when the clubhead remains usable.
This can also provide an opportunity to review your specifications.
However, do not automatically change flex or weight simply because the shaft needs replacement.
If the previous setup worked well, maintaining similar characteristics may be sensible.
A fitting can help when you want to explore alternatives.
Keep a Simple Maintenance Record
Golfers with several sets or expensive equipment may benefit from a basic maintenance record.
Note when grips were replaced, clubs were repaired, or shafts received professional inspection.
You do not need a complicated spreadsheet.
A simple note on your phone can work.
This becomes particularly useful if a club has experienced a major impact or repair.
When you inspect golf shafts later, you will have some history to help evaluate changes.
Create a Five-Minute Inspection Routine
Start by cleaning and drying your clubs.
Check each grip for excessive wear.
Next, rotate every shaft under good lighting.
Inspect steel for corrosion, dents, and bending.
Check graphite for cracks, deep scratches, raised fibers, and splintering.
Then examine ferrules, adapters, and the area where each shaft enters the clubhead.
Finally, make sure clubheads feel secure.
This routine can be completed quickly once it becomes familiar.
Common Golf Shaft Inspection Mistakes
The first mistake is assuming a shaft cannot be damaged because it looks relatively new.
Accidents can affect equipment at any age.
Another mistake is ignoring small areas of exposed graphite fiber.
Golfers may also attempt to straighten bent steel shafts themselves or continue hitting a club after finding a crack.
Finally, some players inspect only the middle of the shaft.
The areas near the bag opening and clubhead deserve equal attention.
Conclusion
Golf shafts are designed to handle repeated swings, but they still deserve routine care.
Begin with a clean club and good lighting. Rotate the shaft slowly while checking the entire surface.
For steel shafts, watch for rust, dents, unusual bends, and severe surface deterioration. With graphite, pay close attention to cracks, deep scratches, exposed fibers, and splintering.
The lower portion of the shaft, bag-rub area, ferrule, and adjustable adapters deserve additional attention.
You should also inspect golf shafts after travel, hard impacts, or long periods of storage.
Most importantly, do not continue swinging a club when you suspect structural damage.
A qualified club technician can determine whether the issue is cosmetic, repairable, or serious enough to require shaft replacement.
Regular inspection takes only a few minutes, yet it can help you maintain your equipment and identify problems before they become more significant.
FAQ
1. How can I tell if a graphite shaft is cracked?
Look for visible cracks, splits, raised sections, splintering, or exposed fibers. If you cannot determine whether a mark is cosmetic, have a club technician examine it.
2. Is rust on a steel golf shaft dangerous?
Light surface discoloration and severe corrosion are not the same. Deep or widespread rust deserves professional evaluation because it may indicate more significant deterioration.
3. Can I keep playing with a dented steel shaft?
A visible dent should be evaluated before normal use continues. Avoid trying to straighten the shaft yourself.
4. How often should golf club shafts be checked?
Inspect them during routine cleaning and after unusual events such as hard impacts, air travel, rough transportation, or extended storage.
5. Should a cracked graphite shaft be repaired or replaced?
Structural graphite damage often requires professional assessment and may require shaft replacement. Avoid attempting a homemade structural repair.